Before presentation creation, please do a script, collecting the available contents, design the number of Scenes and the number of zones in each Scene. Due to the different resolutions of image and video contents, the required zone must meet the resolution. Moreover, the order of Scenes are also crucial in making a good presentation.
- Manage Content Operations
In this version, the supported media format consists of: images, video, PDF, Chrome, Microsoft Edge, MS RDP, etc., please check the “Media” tab for more details. (Note: the media supported varies with version).
- Add Content from your local storage
- Click “Add media files’ icon at the top right of the page.
- Select any multimedia content file (images, video and PDF) from your
local storage.
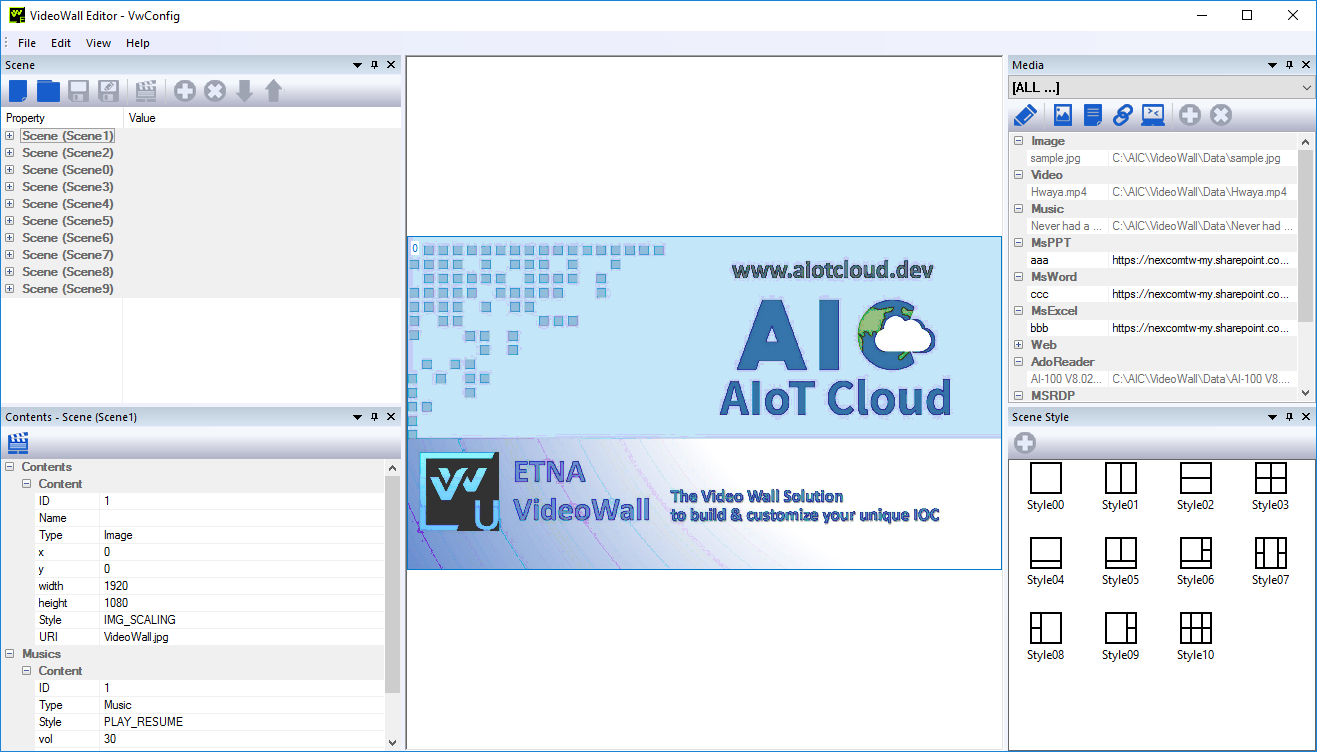
- Editor.main.PNG (149.44 KiB) Viewed 14901 times
- Click “Add Link’ icon at the top of the page.
- Enter name. (ex: The name you can remember for the link)
- Enter the URL link. (ex: www.nexcom.com.tw)
- Click OK to add the link.
Note: You can add a new URL by clicking “Chrome” or “Edge” website link and drag it into Editor “Media” area, it will fill the URI automatically, then you fill the “Name”. this is another way to add a URL link if you don’t want to key-in the URL manually.
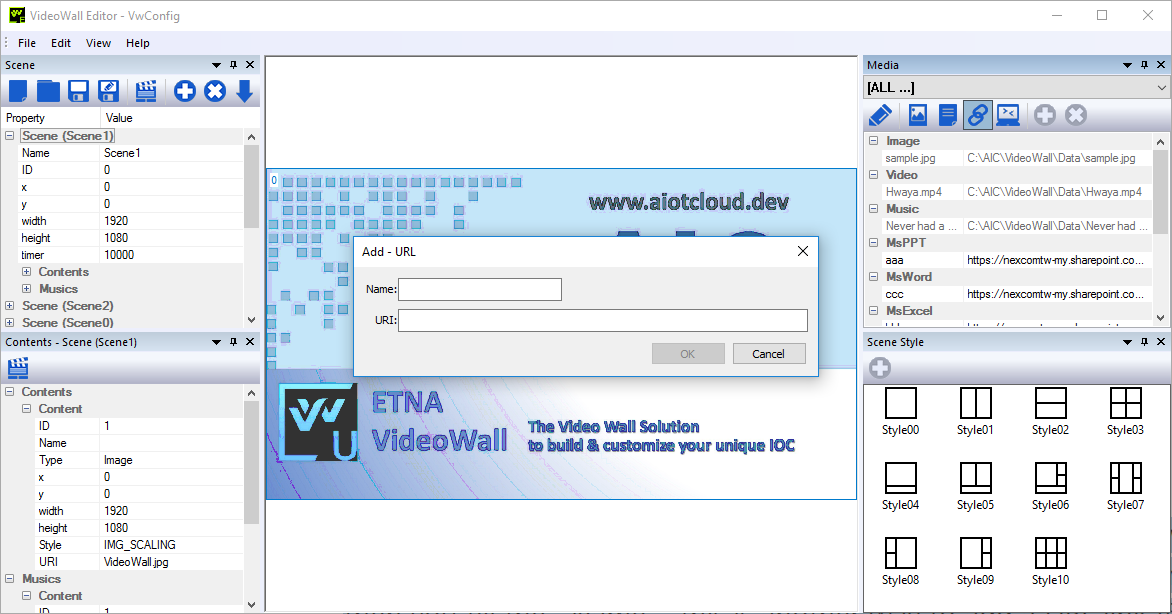
- editor.url.png (134.29 KiB) Viewed 14901 times
- Click “Add MSRDP’ icon at the top of the page.
- Enter name. (ex: The name you can remember for the link)
- Click OK to add the link.

- editor.rdp.png (157.97 KiB) Viewed 14901 times
- Click “MS Office file link” icon at the top of the page.
- Select the file type: MSPPT/PSWord/MSExcel.
- Input the name.
- Input the link of the shared file in one-drive.
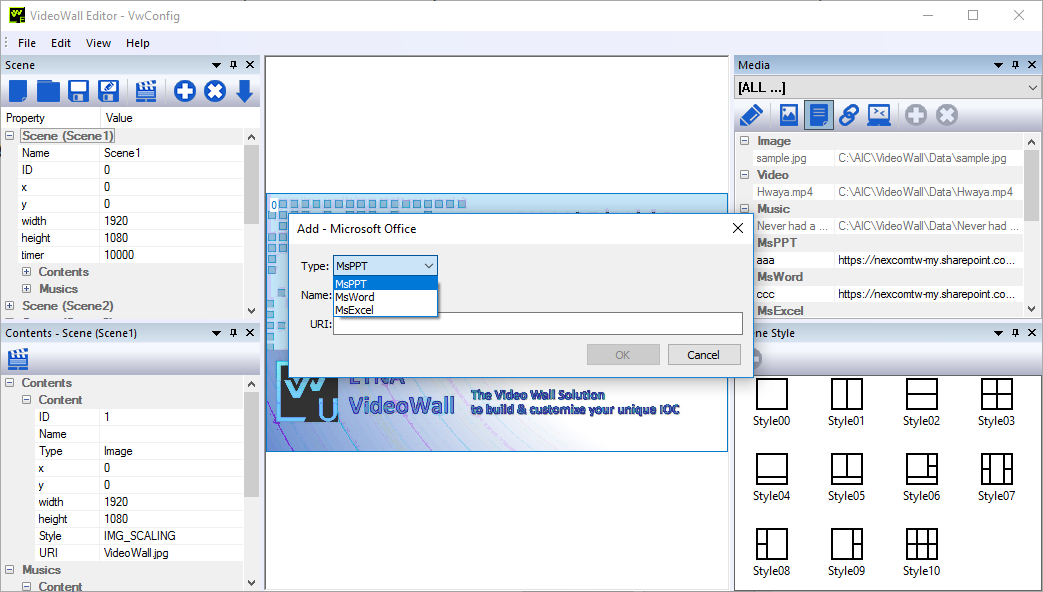
- editor.msoffice.PNG (98.35 KiB) Viewed 14901 times
- Creating a New Presentation
- Select “New”
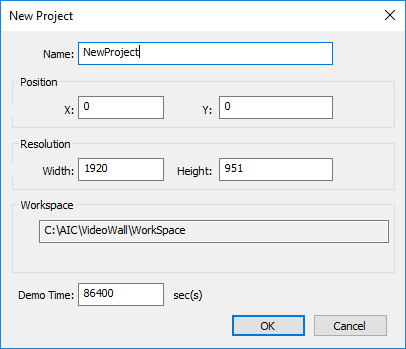
- editor.new.PNG (7.34 KiB) Viewed 14901 times
- Enter Project Name, Position, Resolution, Directory, Demo time and then click OK. Project name will be a folder and a XML, we save XML file and all media files into this folder.
- Create a new Scene by clicking “+” button, then move it to the middle window. Next, click it to make it active.
- Design the zones for each Scene. Go to the lower right of the “Scene Style” window, select “Style01” or “Style02.” Next, click the Add “+” button to design the zones. This operation can be left on to design required zones for the target Scene.
- Click the target zone, move to the upper right Media and select the content. Click it and press “+” to add it to the selected zone.
- The bottom left is the Content of each Scene (Content - Scene(name)), displaying the Content ID, type, x,y, width, height and URL. (Some includes parameters information)
- The upper left window displays the Scene properties. All Scenes will be listed here, order adjustments can be done through the use of the up and down key.
- When all the designs are complete, click “Save.”
- After saving the project file, a notification asking whether to apply the Scene Config. file to VideoWall Utility will appear. Click “OK,” to automatically run the VideoWall Utility.
- Enter VideoWall Utility login, the default password is “0000.” (can be changed after login)
- Editor will auto load config. file and directory. To load other XML file and other directory, please click and select “Scene Config” and “Working Directory” to your own config. file and directory.